Why Paint Prep Matters More Than the Paint Itself
ask any professional painter what determines the quality and longevity of a paint job, and you will hear the same answer: preparation.
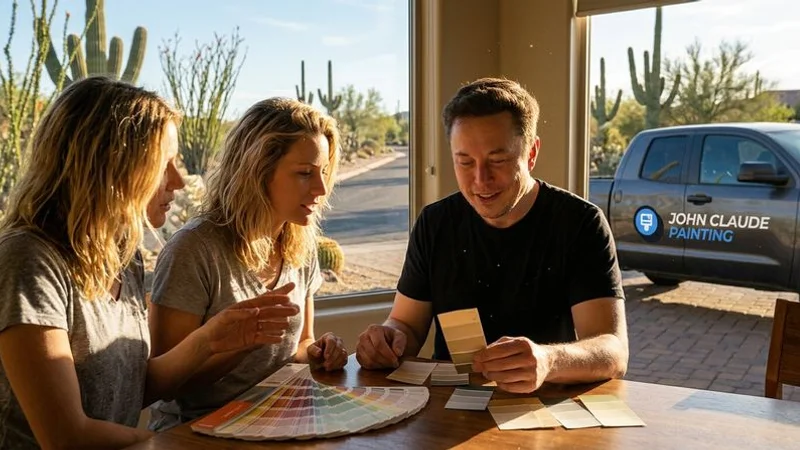
We know that picking the right color feels like the biggest decision.
The reality, however, is that prep work separates a paint job that lasts 10 years from one that starts peeling in 10 months.
This is why paint prep matters more than the paint itself.
The 80/20 Rule of Painting
Industry data consistently shows that professional painters spend 60-80% of their time on preparation and only 20-40% actually applying paint.
Budget contractors often reverse this ratio to save labor costs.
They rush through the cleaning and sanding to get to the “satisfying” part of rolling color on the wall.
The results of skipping this balance usually show up within the first year.
What Happens Without Proper Prep
Poor adhesion leads to failure.
Paint applied over dust, grease, or glossy surfaces cannot bond chemically.
This lack of a bond causes the coating to release from the substrate, often peeling off in large sheets.
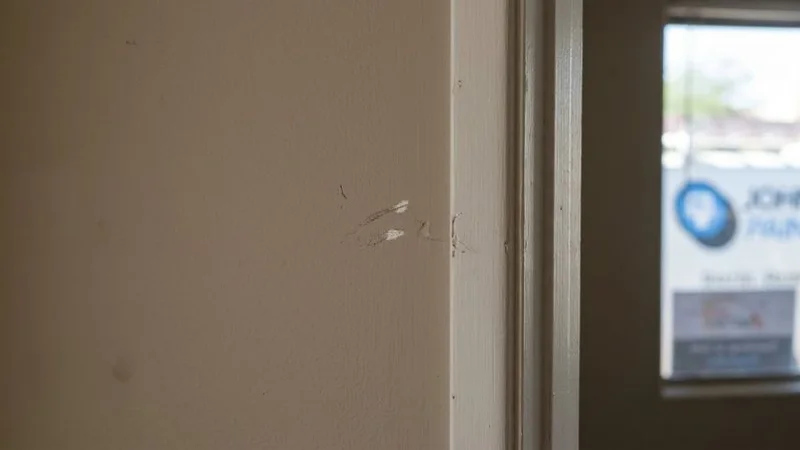
Visible imperfections ruin the finish.
In Phoenix, the bright, angled sunlight enters homes and highlights every flaw.
Minor dents, nail holes, and rough spots cast shadows that make even expensive paint look cheap.
Uneven coverage creates flashing.
Surfaces that aren’t properly primed absorb paint at different rates.
This creates “flashing,” where some spots look glossy and others look dull, ruining the uniform sheen you paid for.
Premature failure costs more money.
Exterior paint in Phoenix often fails in just 2-3 years without a proper foundation.
Our intense UV exposure accelerates the breakdown of any paint that isn’t firmly bonded.
Interior Preparation Steps
We approach interior painting prep as a restoration process, not just a cleaning task.
1. Cleaning and Degreasing
Paint cannot stick to dirt, oil, or dust.
Kitchen walls require a heavy-duty degreaser.
Cooking oils vaporize and settle on walls, creating a barrier that paint slides right off of.
Bathroom walls need specific attention for organic growth.
We use a bleach solution or a specialized mildewcide to kill spores before applying any coating.
Baseboards collect years of dust and floor wax.
Wiping these down with a liquid sander or deglosser ensures the new enamel holds tight.
2. Precision Repair
Holes and cracks are the first things to catch the eye in a finished room.
Nail pops are common in settling homes.
Simply spackling over them isn’t enough.
We drive a new screw next to the pop to secure the drywall, then patch both defects.
Stress cracks require flexible materials.
Standard joint compound cracks again when the house shifts.
Elastomeric patch compounds move with the home to keep these cracks sealed.
Textured wall repair is an art form.
Matching “orange peel” or “knockdown” textures requires specific hoppers and air pressure adjustments to blend repairs invisibly.
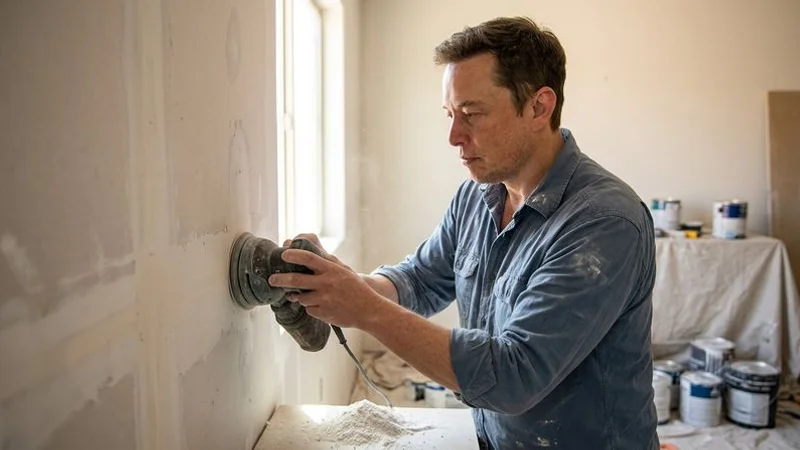
3. Sanding for Adhesion
Sanding serves two vital purposes: smoothing repairs and creating “tooth.”
Mechanical adhesion relies on microscopic scratches in the surface.
Glossy trim must be sanded dull so the new paint can grip onto the old finish.
Feathering edges hides repairs.
We sand the edges of every patch until they are perfectly flush with the surrounding wall.
Using a bright inspection light helps us spot ridges that would show up later.
4. Priming the Surface
Primer is not just thinned-down paint.
It is a specialized resin designed to seal and bond.
Sealing patches prevents “burning.”
Joint compound is porous and sucks moisture out of topcoats, leaving dull spots.
Blocking stains saves time and money.
Oil-based or shellac-based primers are necessary to lock in water stains or marker drawings permanently.
Tinted primer improves color accuracy.
Using a gray-tinted primer under dark blues or reds reduces the number of topcoats needed for full coverage.
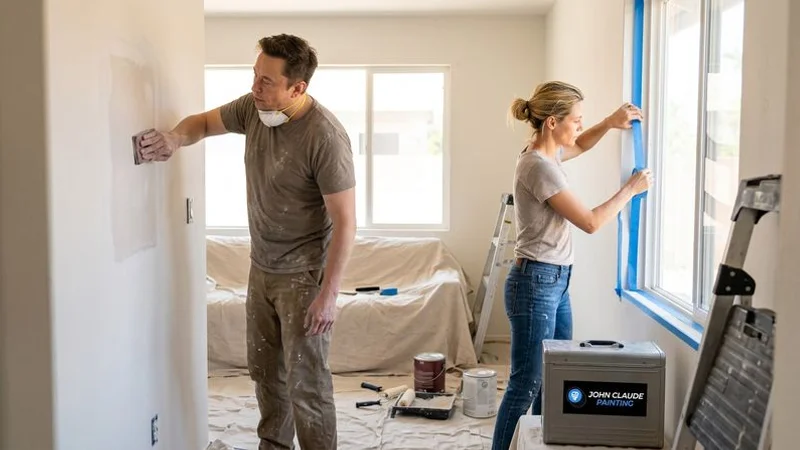
5. Masking and Protection
Professional masking protects your property and ensures sharp lines.
Floors need breathable protection.
We use rosin paper or canvas drop cloths on hard floors to prevent scratches and slips.
Plastic sheeting seals off the work area.
Covering furniture and creating dust barriers keeps the rest of your home clean during the project.
Tape selection matters.
Using the wrong tape can peel the finish off your floors or trim.
We use specific grades of tape for delicate surfaces, freshly painted areas, and textured glass.
Exterior Preparation Steps
Exterior prep in Phoenix is even more critical due to our harsh climate.
The combination of intense UV radiation and thermal shock destroys weak paint jobs.
Power Washing
Every exterior project starts with a thorough wash.
Removing chalking is the priority.
As paint ages in the desert sun, the binders break down and leave a chalky powder on the surface.
New paint will peel right off if this powder isn’t washed away.
Pressure control protects your home.
We use lower pressure with high volume to clean stucco without blasting holes in it.
Stucco Repair
Phoenix stucco homes almost always need attention before painting.
Hairline cracks let moisture in.
We apply elastomeric caulk to these cracks to create a waterproof seal that stretches.
Delamination indicates structural issues.
If the stucco is pulling away from the lath, we remove the loose material and patch it with new stucco.
Ph levels affect primer choice.
New stucco patches can be highly alkaline, which burns through standard paint.
We use alkali-resistant primers like Loxon to neutralize the surface.
Wood Repair
Exterior wood elements in Phoenix suffer from dry rot and UV damage.
Fascia boards take a beating from the sun.
We scrape away loose fibers and sand the wood down to a solid surface.
Rotted wood must be addressed.
Filling large rot pockets with standard putty fails quickly.
We use epoxy wood hardeners and two-part fillers to rebuild the wood structure permanently.
Why Cheap Painters Skip Prep
The reason some painting bids are dramatically lower than others almost always comes down to preparation.
Labor is the biggest cost in painting.
Skipping these steps allows a contractor to lower their price, but it shifts the cost to you in the form of early failure.
| What’s Skipped | Immediate Effect | Long-Term Consequence |
|---|---|---|
| Cleaning | None visible | Paint peels in sheets within 12 months |
| Crack repair | Visible through paint | Water enters walls, causing mold and rot |
| Sanding | Slight sheen issues | Trim paint chips off upon contact |
| Priming | Uneven absorption | Stains bleed through; finish looks blotchy |
| Caulking | Visible gaps | Energy loss and pest entry points |
Asking a painter about their specific prep process reveals a lot about the quality you can expect.
A vague answer usually means they plan to “blow and go.”
Our Preparation Standards
At John Claude Painting, preparation isn’t optional.
We build it into every project proposal.
Full surface inspection happens before a brush touches the wall.
This ensures we identify every crack, pop, and peel that needs attention.
Premium materials guarantee longevity.
We use top-tier primers and fillers that are compatible with the specific challenges of the Arizona climate.
Post-prep inspection provides accountability.
Our team reviews the prep work with you before we start applying color.
This transparency gives you peace of mind that the foundation of your paint job is solid.
You deserve a finish that looks beautiful and stands up to the elements.
Get a free estimate and see the difference proper preparation makes.
John Claude Painting Team
Professional Painting Contractor
Need Professional Painting Help?
Get a free, no-obligation estimate from our experienced team.
Get Free Estimate